Menu Bar
Orgvue menu options
From the menu bar you can access the following menus and sub menus
Select the links below for more detail on each menu option
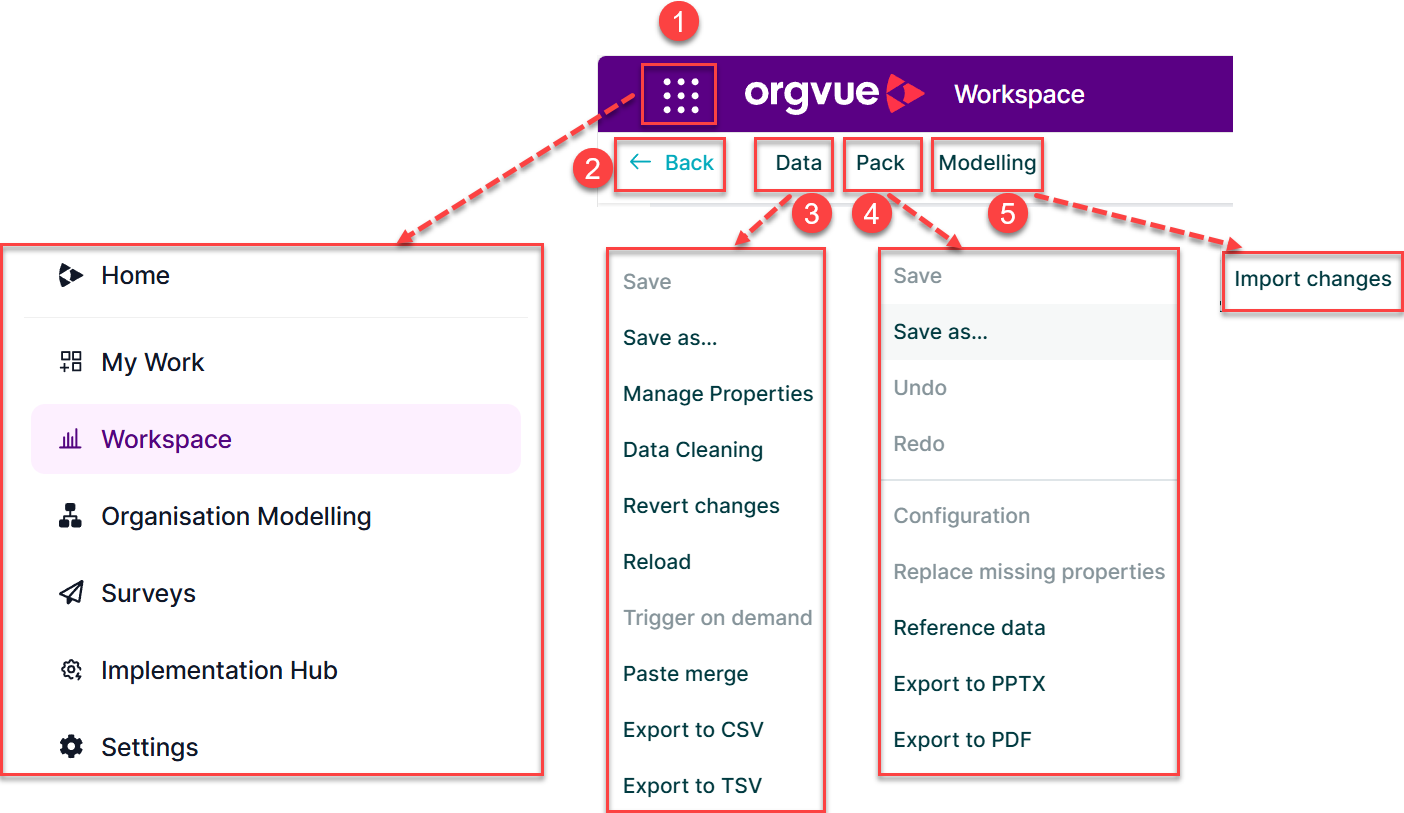
- Menu Button
- Data Menu
- Pack Menu
- Modelling Menu
Data Menu
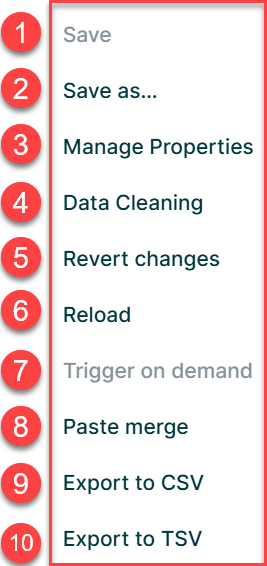
The Data Menu Contains:
- Save
- Save as
- Manage Properties
- Data Cleaning
- Revert Changes
- Reload
- Trigger on demand
- Paste Merge
- Export to CSV
- Export to TSV
If you are the owner of the dataset or have been given rights to edit the data, then any changes that you make to the dataset may be saved using the save options and this will overwrite the previous data
If you wish to preserve the original data and create a copy of the original with any changes, then the save as option should be used
Any unsaved changes to the data may be undone by using the Revert Changes option
Data Save
The save option is accessed from the Data option on the menu bar or the keyboard shortcut CTRL + S (CMD S for Mac) may be used
The option to save the data will depend on the user’s access level to the dataset and any unsaved changes that have been made to the dataset
Attempting to edit data for any duplicate nodes in your dataset will block the ability to save your dataset regardless of access levels.
Each node in your dataset must have a unique ID to allow editing
The Save function will overwrite the open dataset with any changes as displayed in the changes section of the footer

If the user does not own or have edit rights to the dataset being accessed, then this will be indicated by the Read Only message being displayed in the header bar

When using the Data - Save option a summary of changes will be displayed as well as confirming the last modification date & time
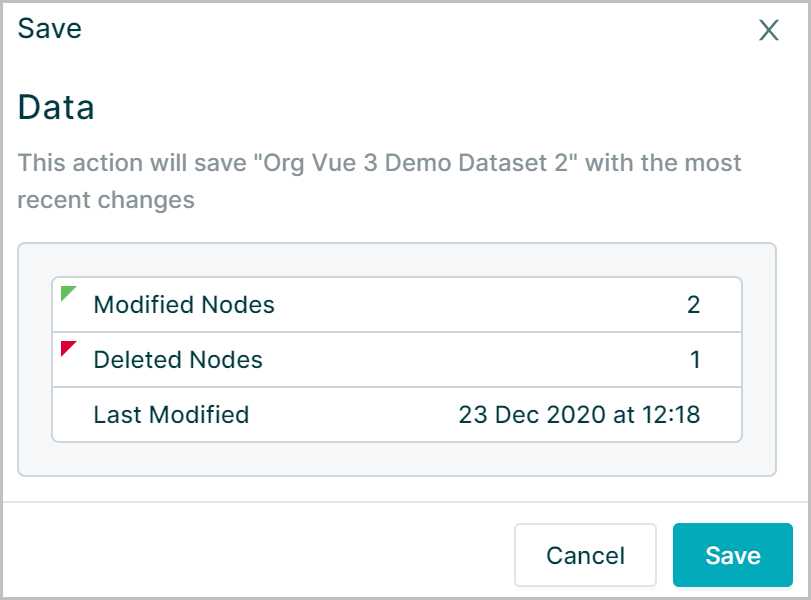
Once a dataset has been saved with any changes, the footer bar will reset and reverting changes will not be possible
Data Save as
Selecting the save as... option from the menu bar will open the save as window where you choose to either save a copy of the dataset with any changes without altering the base
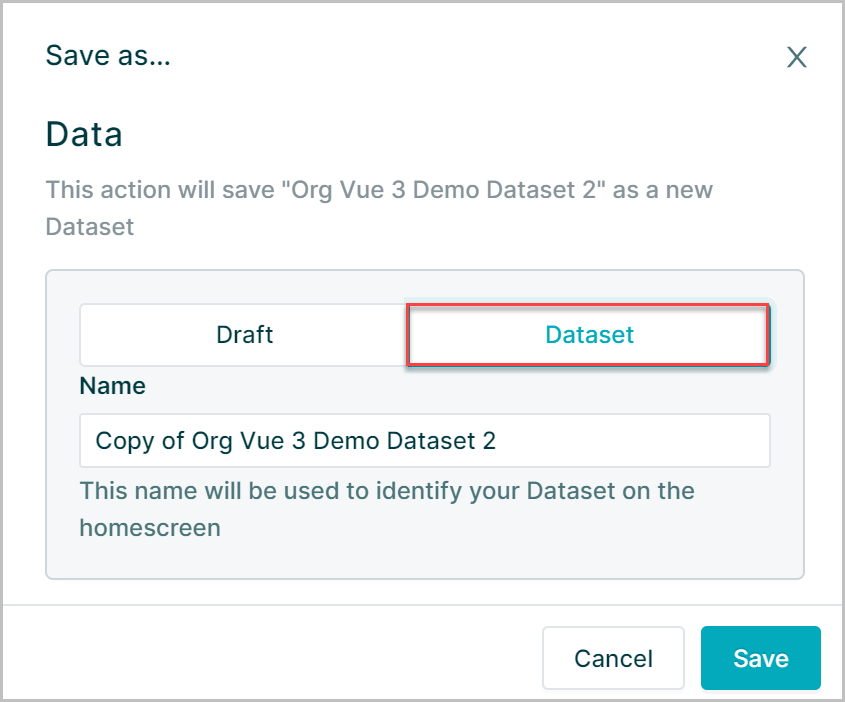
Or you can choose to save as the dataset as a draft so that any changes may be imported into other datasets
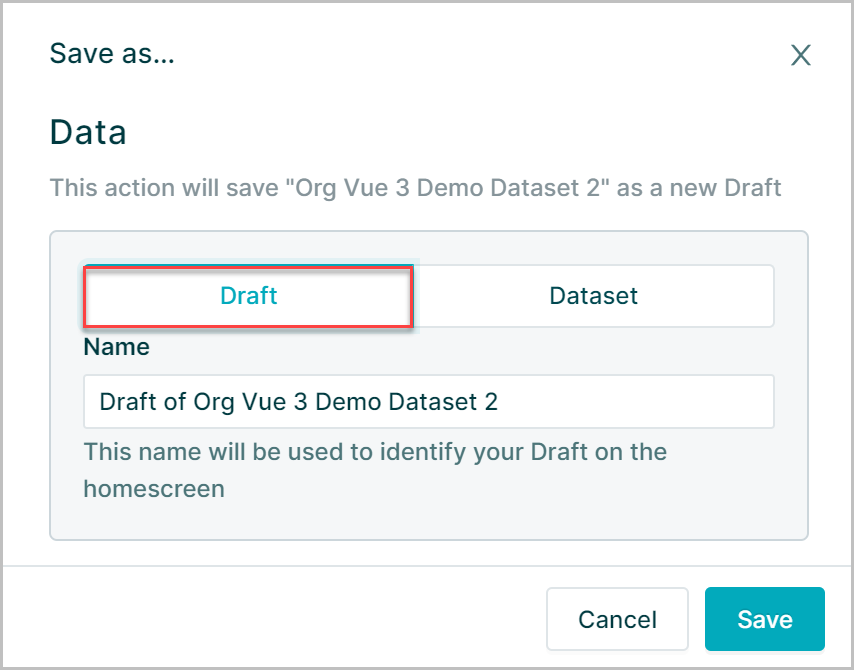
For more detail on Drafts see Drafts
When using the Save as option to create a copy of a dataset any property tags and alternative property keys will be copied from the source dataset however neither dataset permissions, property permissions or dataset tags will be copied
The creator of the copy will then effectively become the owner of the dataset and therefore inherit admin rights for all properties that they had access to in the source dataset
To view a video on the difference between Save and Save as click the thumbnail to open the video in a new browser tab
It is not possible to use the Save as option when working with linked datasets.
It is however possible to save as the From and To datasets, but they will need to be linked in with the original links dataset first exported to csv and then
Reload
The option to Reload data is useful when changes have been made to the dataset within the Property Manager while the dataset is open on workspace
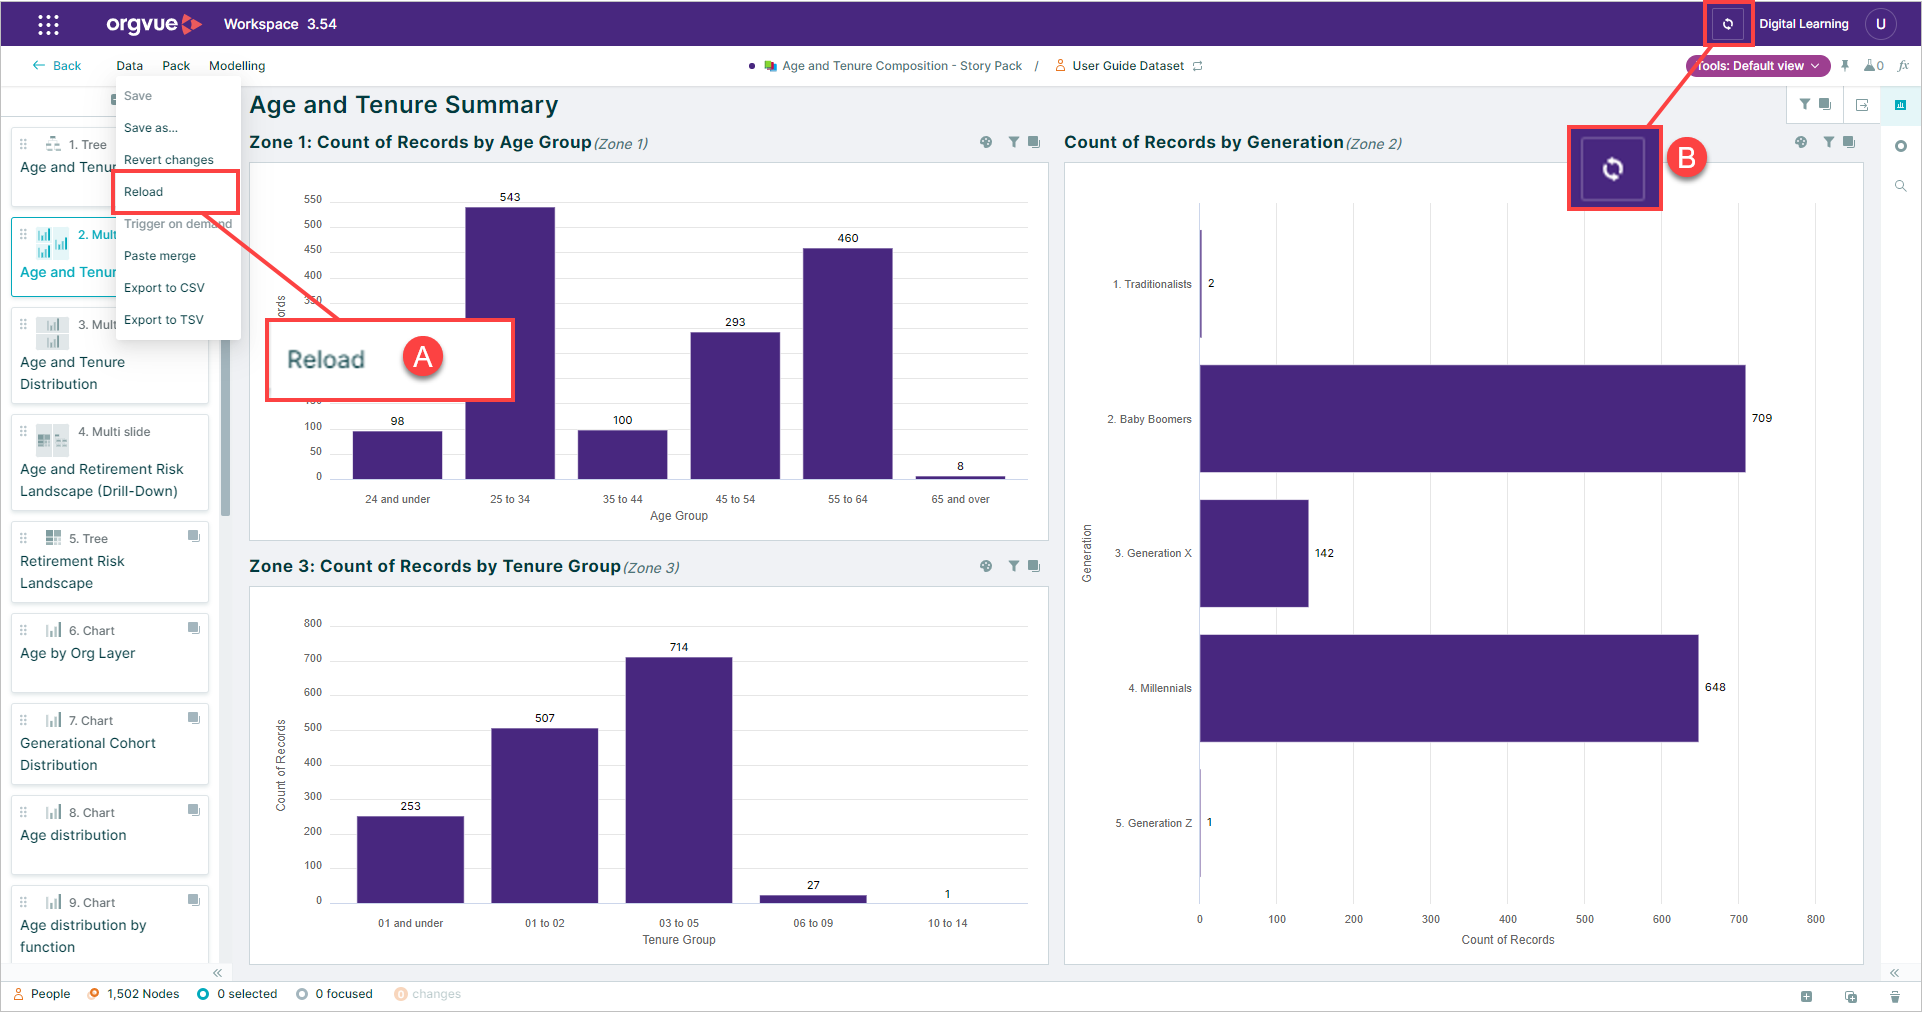
Selecting either:
- A. Reload option on Data menu
- B. Reload button
Will reload the data for the current dataset and apply any changes made since dataset was last opened or refreshed
Trigger on demand
Select this option to run any On demand expressions in the dataset
See On Demand Expressions for more details
Export Data to CSV or TSV
Data from a dataset may be exported directly from Orgvue workspace to a CSV or TSV file for use outside Orgvue
To export the content of a single slide see Export Canvas Content
To export the data from a dataset, select Data from the menu bar then Export to CSV or TSV as required
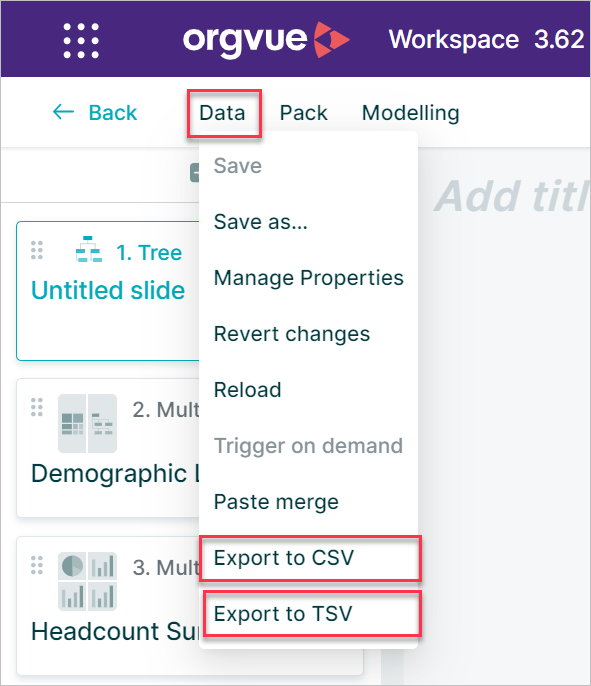
This will open the export panel which contains the following options:
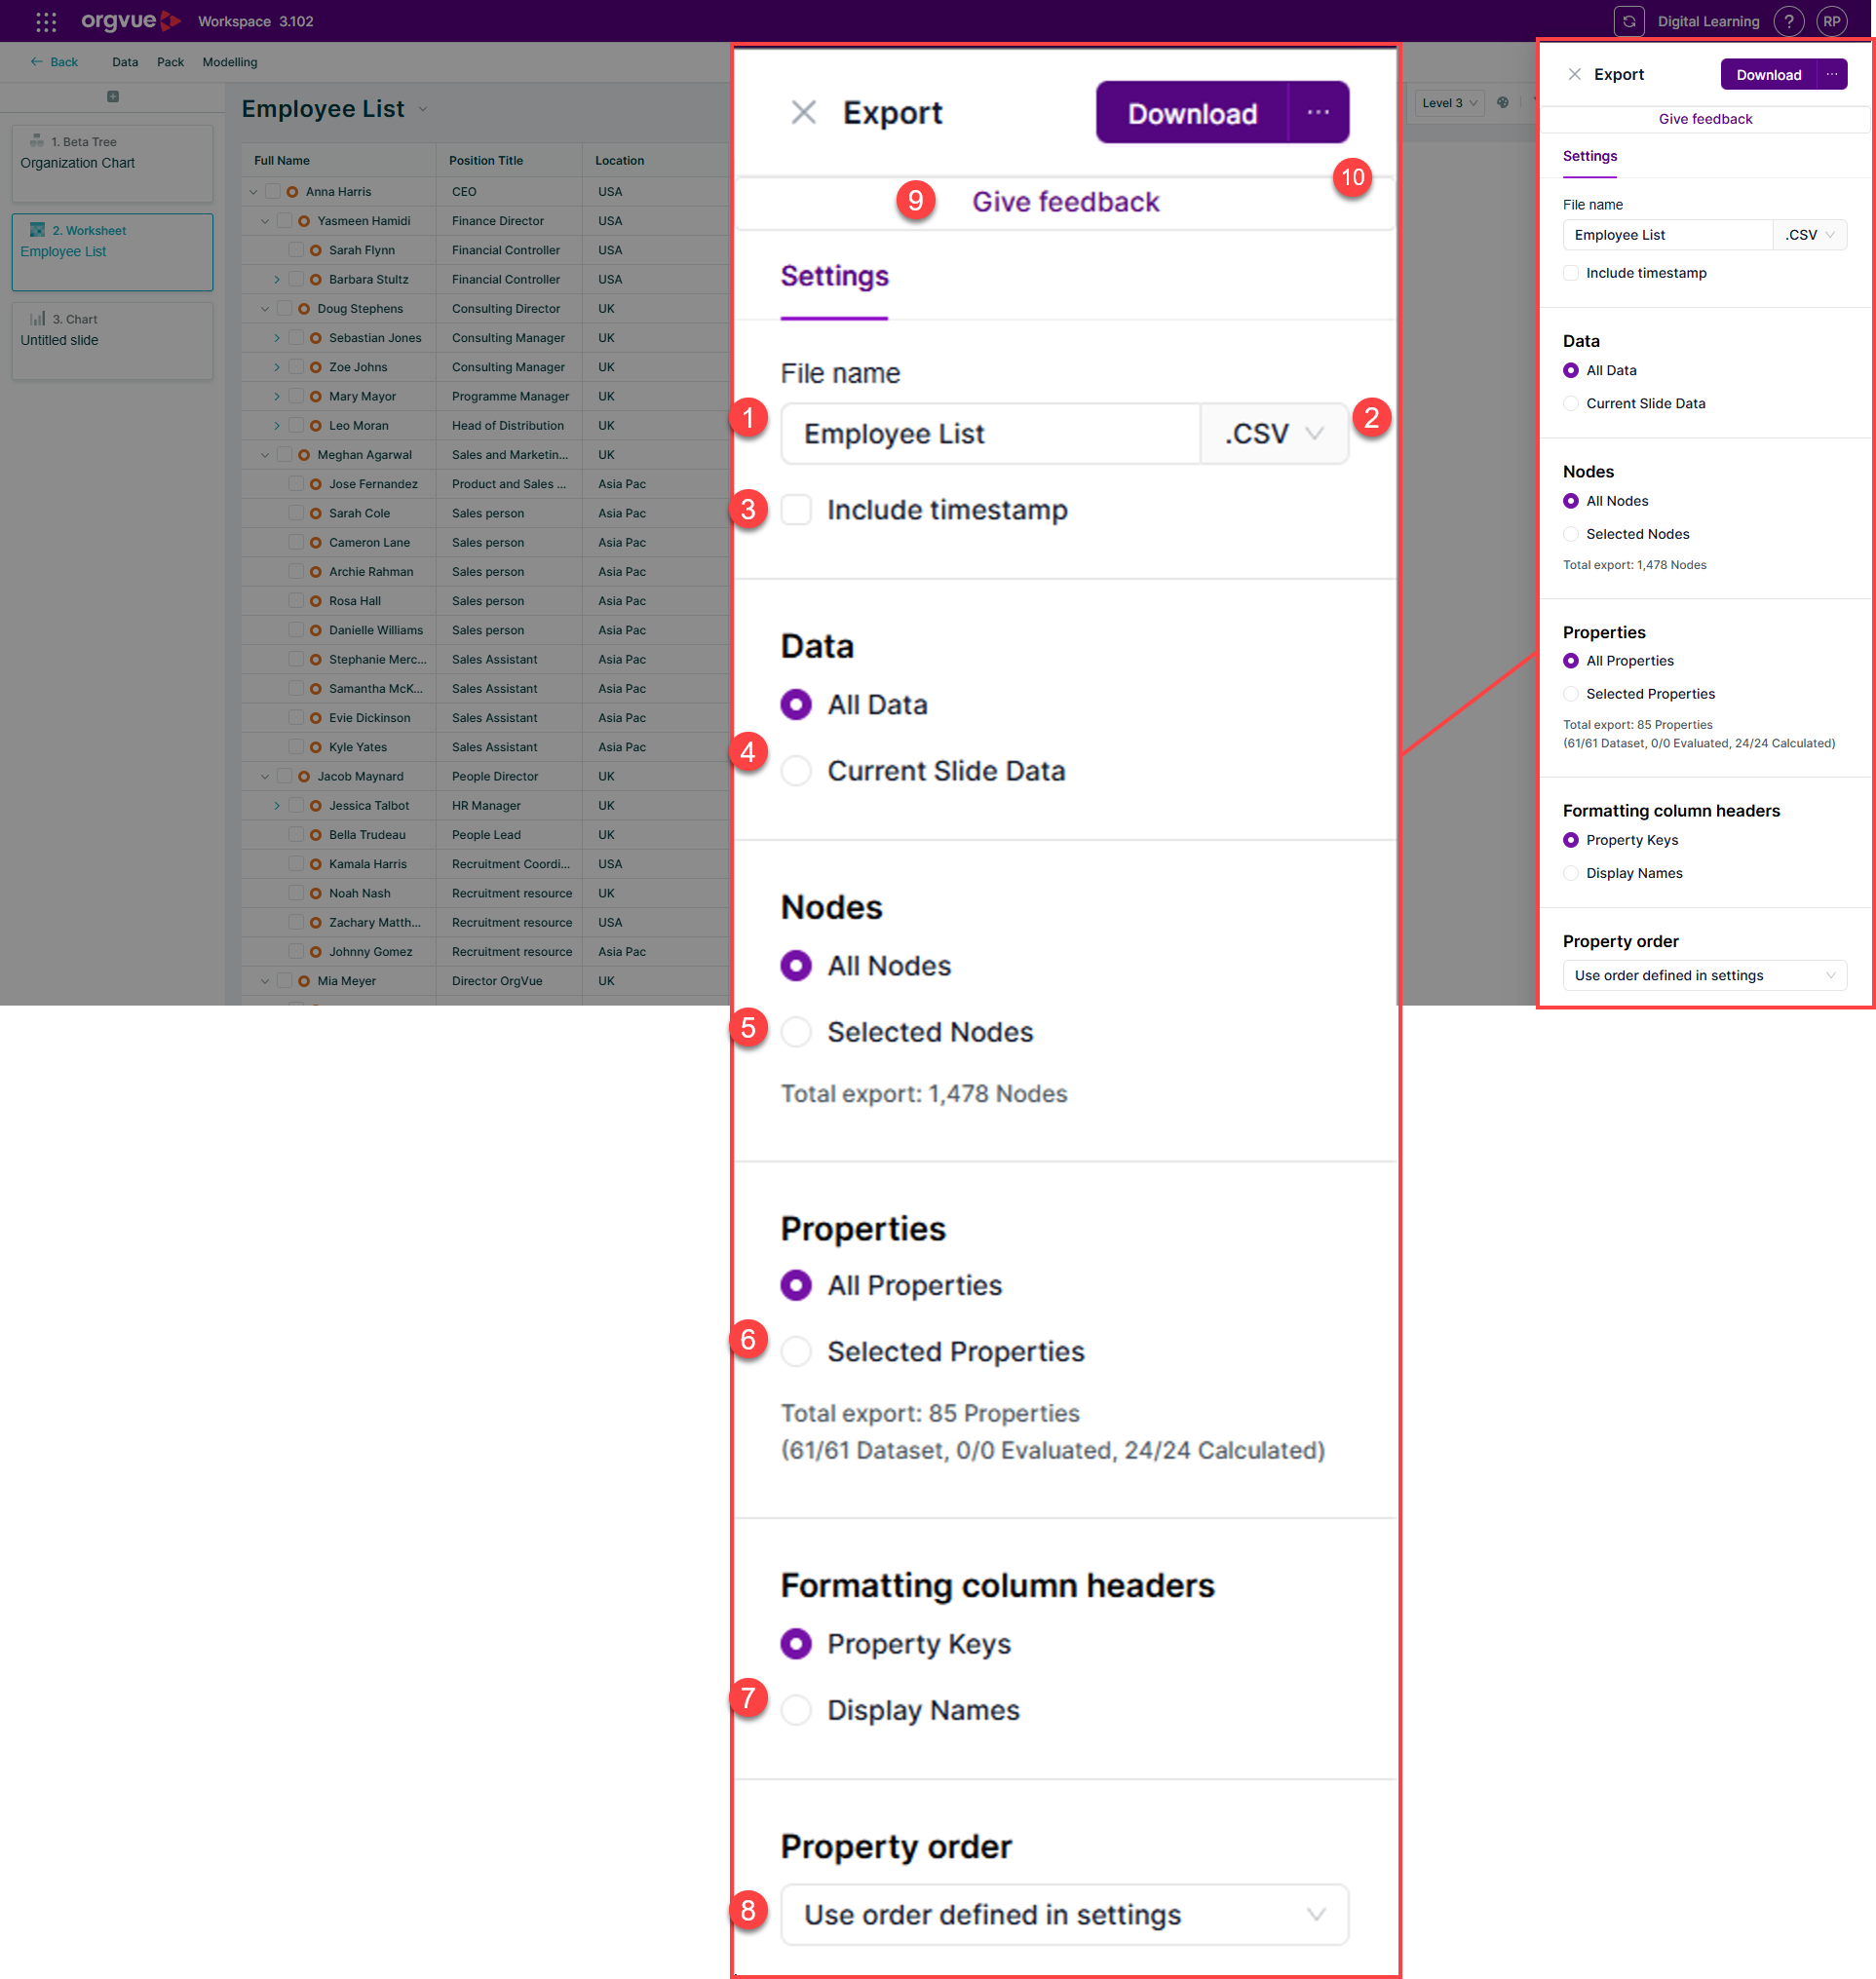
- File Name for .csv export
- File type selector:
csvortsv - Checkbox option to include timestamp in filename
- Data: Export
All Dataor Current Slide Data only - Nodes: Select
All NodesorSelected Nodes. See Selecting Nodes for details on the various methods available to select nodes in Orgvue - Properties: Choose to export
All Propertiesin your dataset orSelected Propertiesonly. See the Editing Nodes section for details on how to select properties - Formatting Columns Headers: Select to use
Property keysorDisplay namesas columns headers in your exported file - Property order: Set the order of properties in your export. Select from
Use order defined in settings,Alphabetically (A-Z)orAlphabetically (Z-A) - Give feedback: Tell us how you feel about the new export controls
- Download: Download export with selected settings
To adjust the order of properties using the Property Manager in Settings see
For detail on the different ways to select multiple nodes for export see Selecting Nodes
Pack Menu
A Pack is a collection of Slides which are displayed on the left-hand panel, on the left-hand side of the canvas
You can save your Packs and then access them directly from the Landing Page
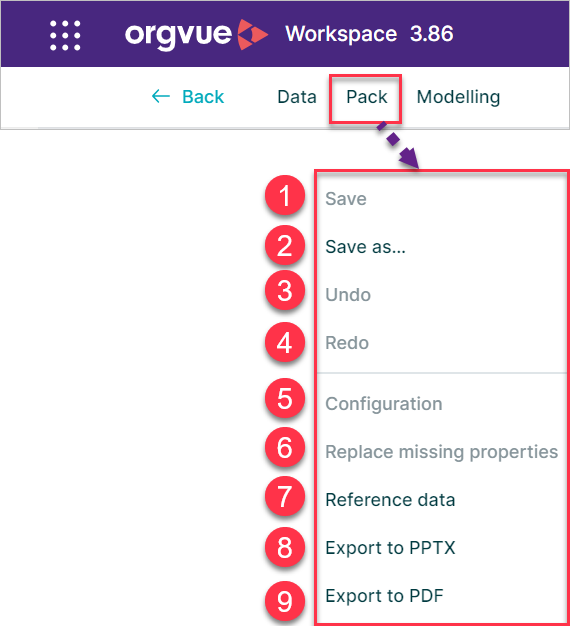
You have the following options from the pack menu:
- Save
- Save as...
- Undo
- Redo
- Configuration
- Replace missing properties Admin Only
- Reference data
- Export to PPTX
- Export to PDF
Pack Save
The save option will update a previously created pack configuration including any changes replacing the existing pack. This will include the dataset currently being viewed or any applied filters
Pack Save as
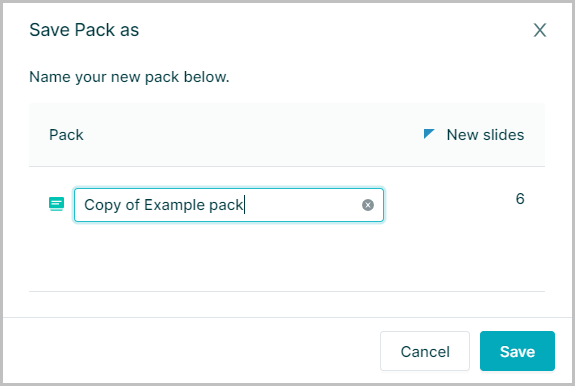
The Save as... option is used when saving a new pack for the first time or when you wish to create a copy of an existing pack to make changes while preserving the original pack
Selecting the Save as.. option will open a dialogue window which will enable you to enter a name for the pack
Creating a copy of a pack using the Save as option will copy all tags, visible pack permissions and pack properties from the source pack
You can also rename a Pack by double-clicking on its name in the Header, pressing the Enter key and then using the Save button to save the new name
Undo
Any changes made to the configuration of a pack (e.g. changing colors, adding or removing slides, filters and paging) since the pack was opened, can be undone using the Pack – Undo option from the menu bar
This will also undo any changes that have been saved since the pack was opened. The Undo and Redo options only applies to the configuration of the pack and not to any changes to the data
It is not possible to specify which individual changes are undone
Redo
Any changes that have been undone using the Undo option can be re applied using the Redo option
Changes can only be undone and redone whilst the pack remains open. Once the pack is closed and reopened, any previous changes are no longer available to undo