Selecting Nodes
Select nodes within a tree or worksheet in multiple ways and view summary details, in the Data Summary tab regarding the selected nodes
Select Single Node
Single nodes may be selected on various slides
Select A Single Node On a Tree Slide
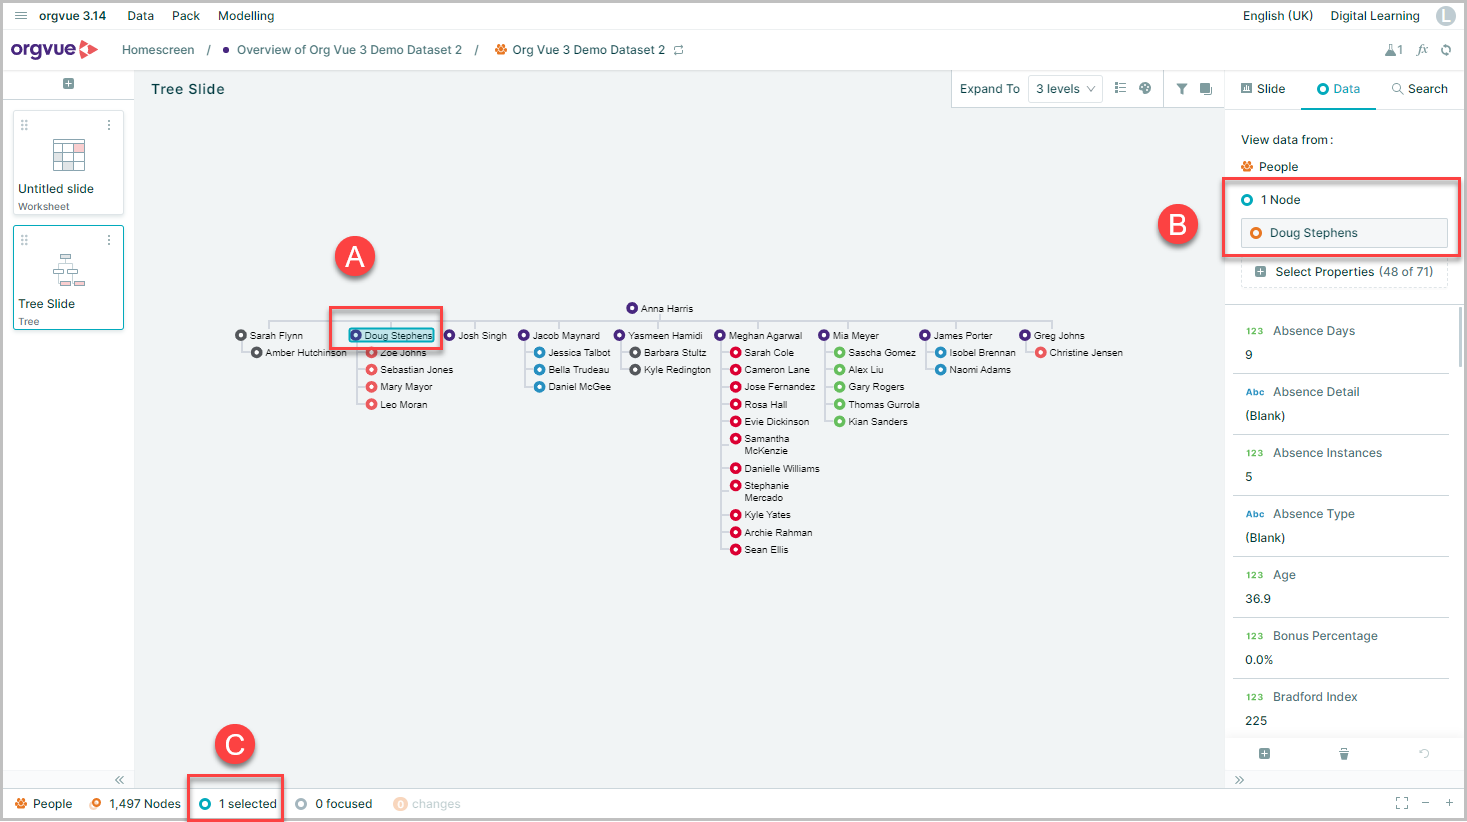
Selecting a node via a single left-mouse click on a Tree slide will:
- A. Highlight the node in blue
- B. The node details will be shown on the Data tab
- C. The footer bar will confirm 1 node selected
It is also possible to select a node by dragging it onto either
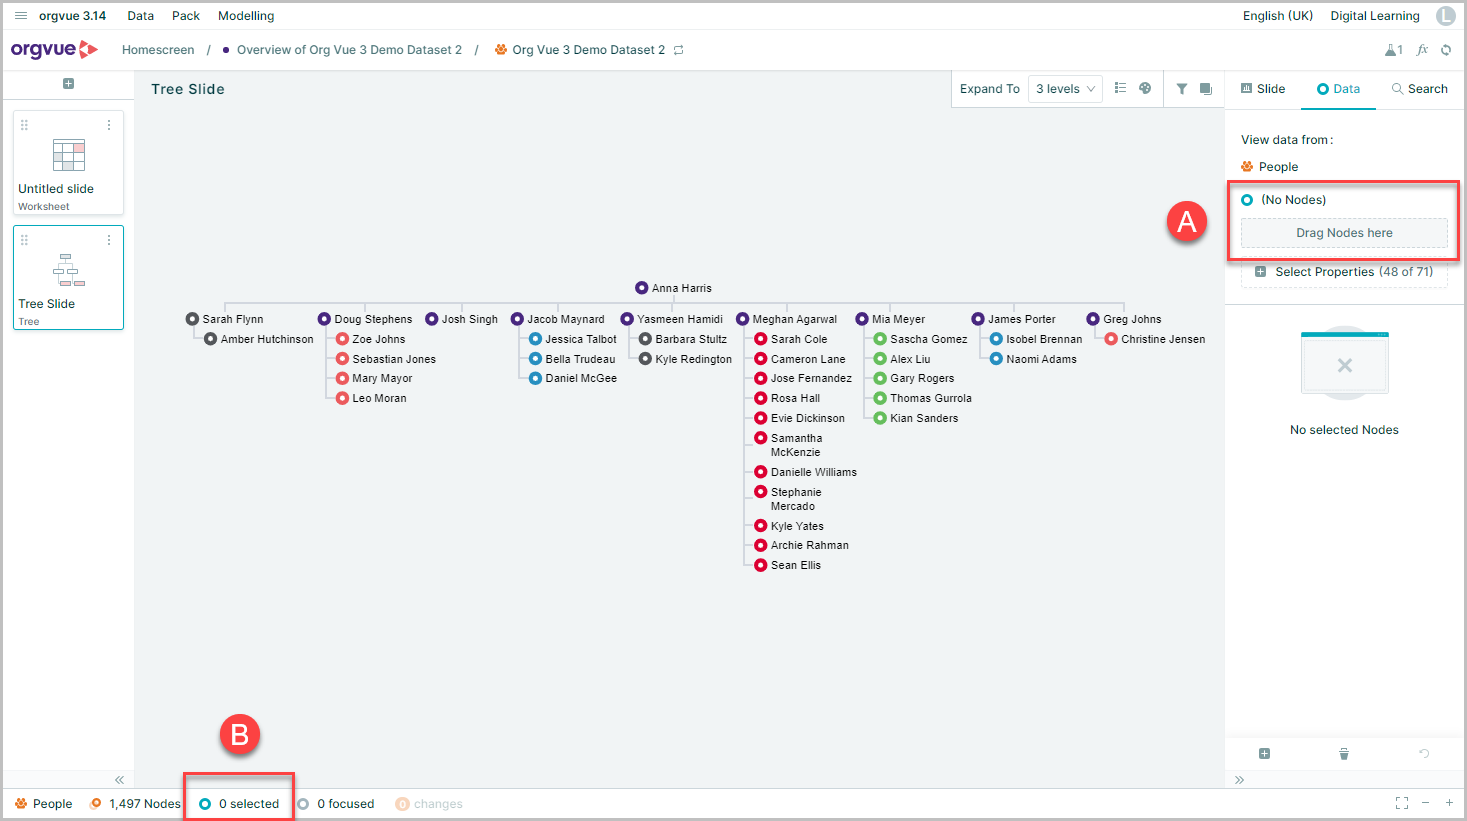
- A. Node selection area of Data tab
- B. Nodes Selected area of Dataset Node Summary
Select A Single Node On a Worksheet Slide
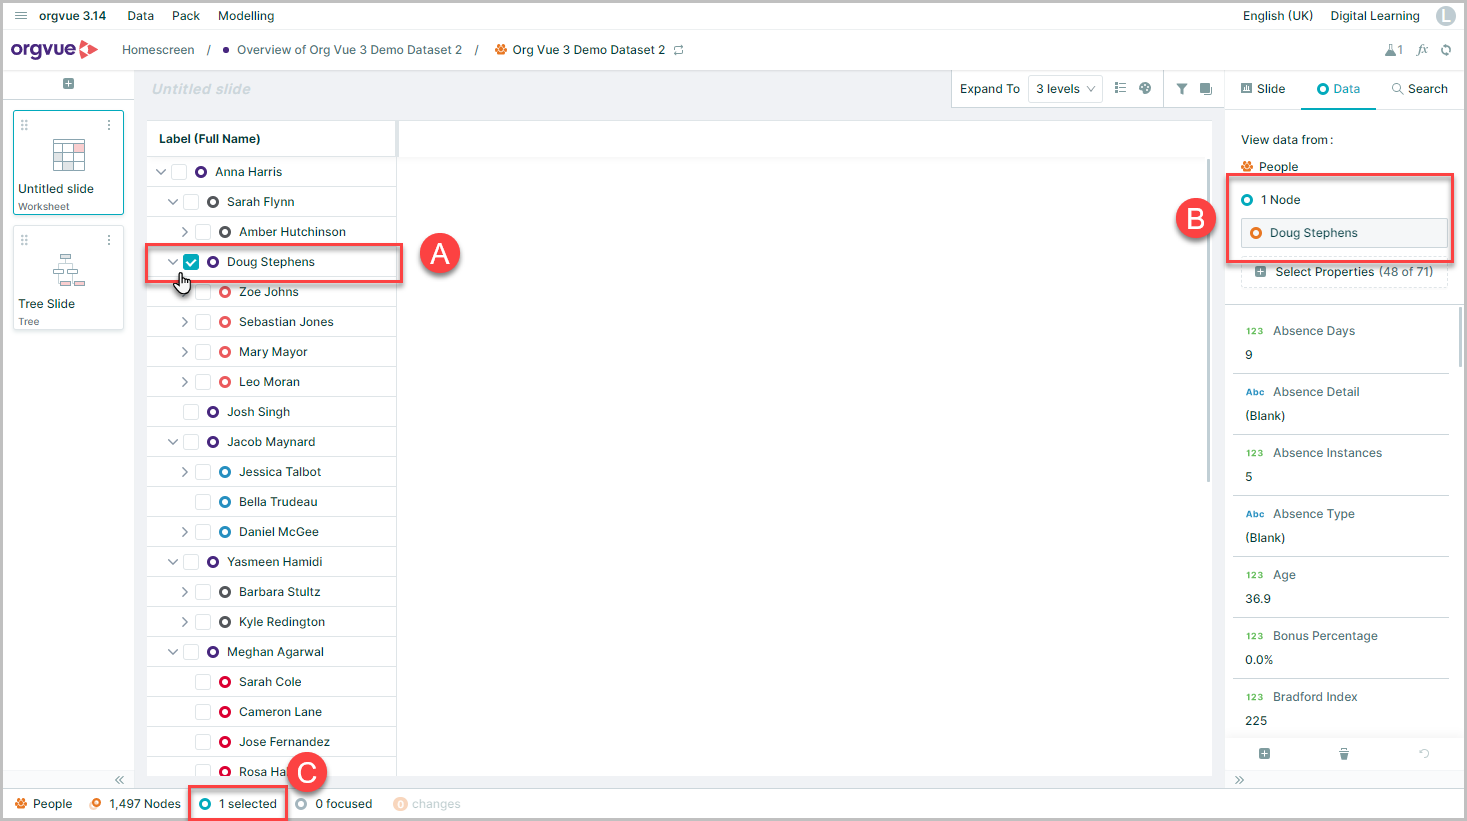
By selecting a nodes checkbox
- A. The checkbox for selected node will be ticked
- B. The node details will be shown on the Data tab
- C. The footer bar will confirm 1 node selected
Select Multiple Nodes
There are several ways to select multiple nodes:
Select Multiple Nodes on a Worksheet Slide
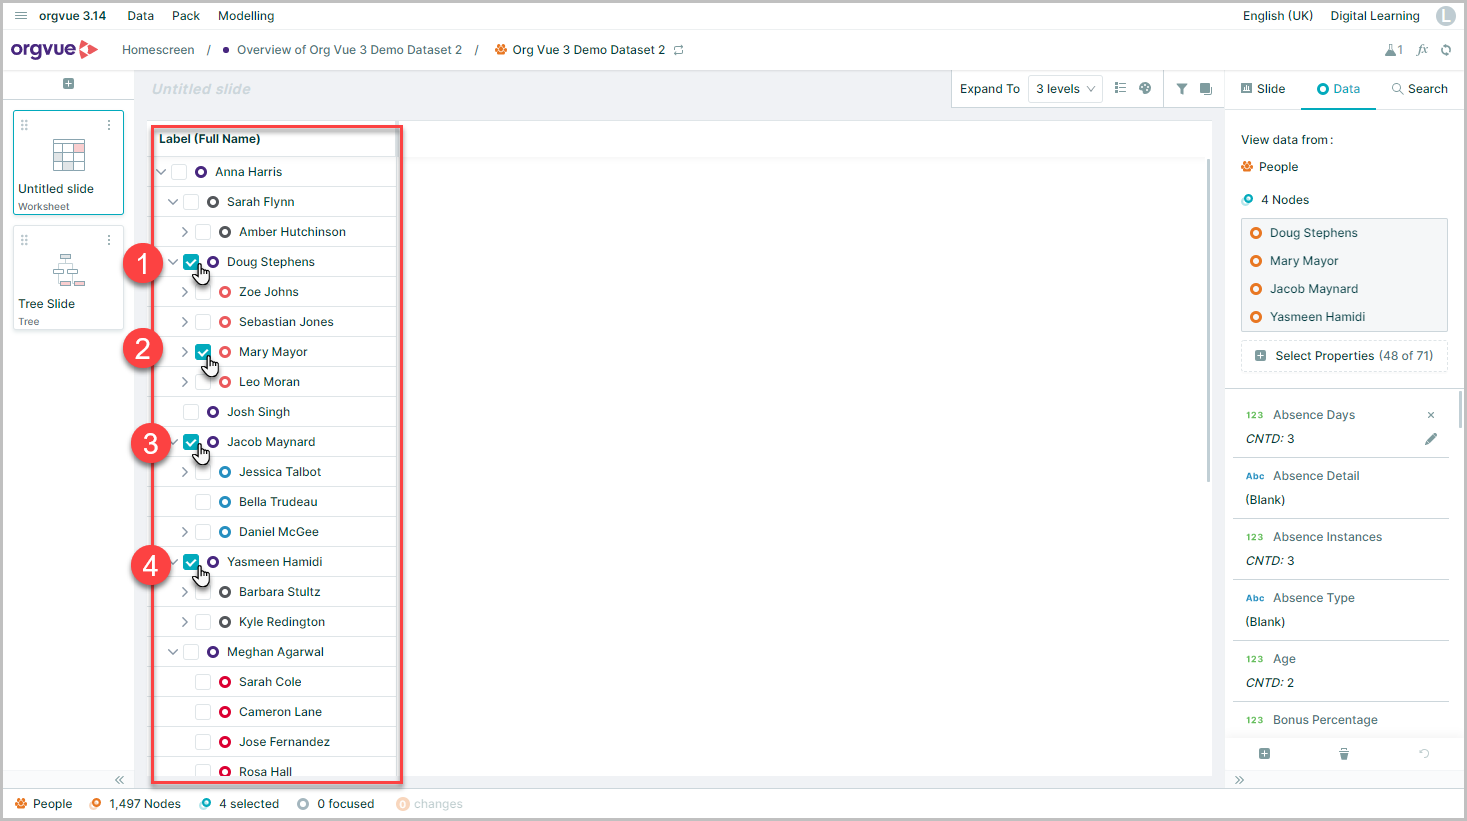
On a worksheet click the checkboxes for each required node to select them
Select Multiple Nodes on a Pivot Slide
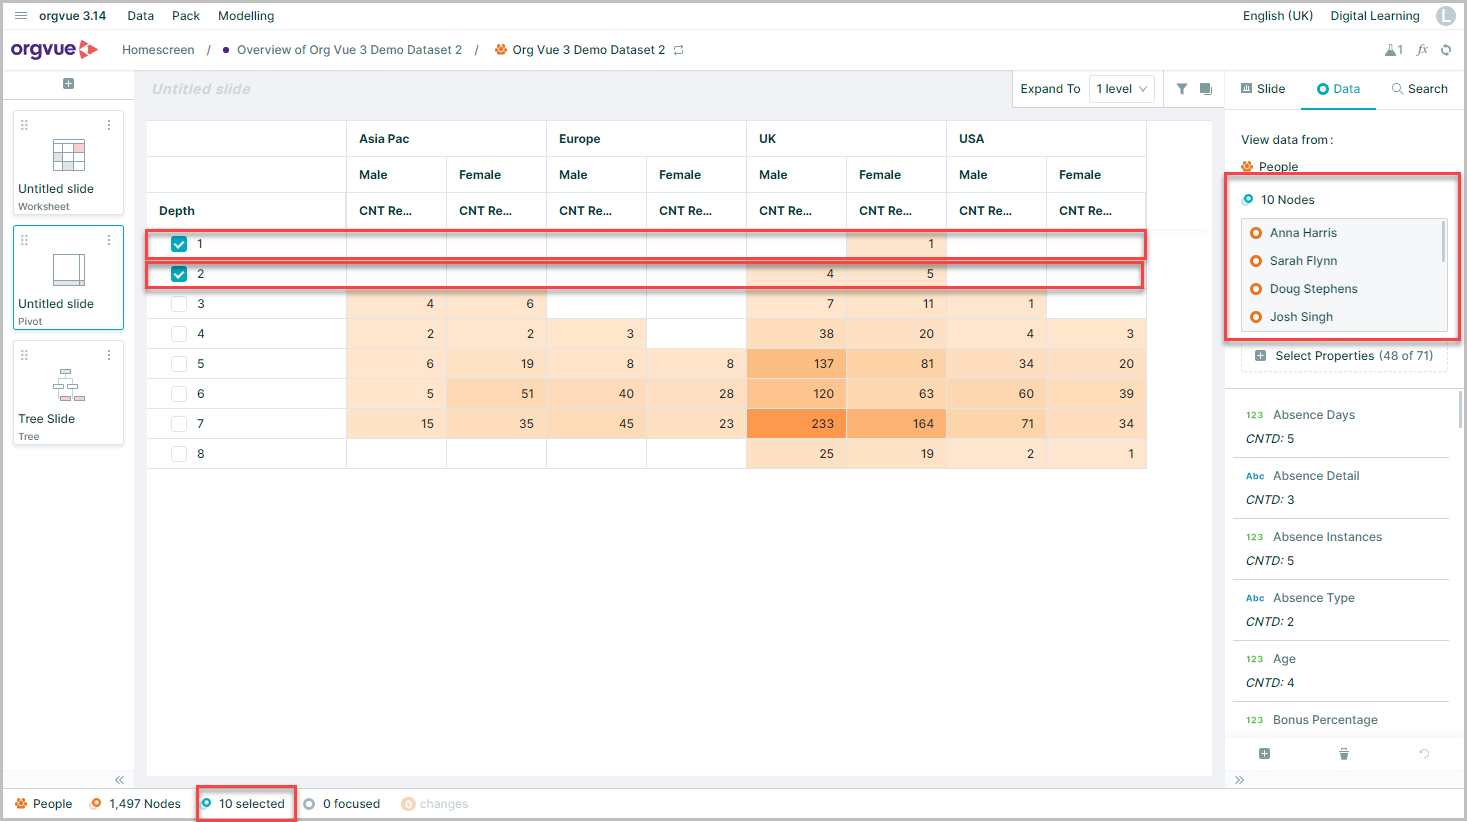
Selecting the checkbox for rows will add all nodes in that row to selection
Select Multiple Nodes on a Tree Slide
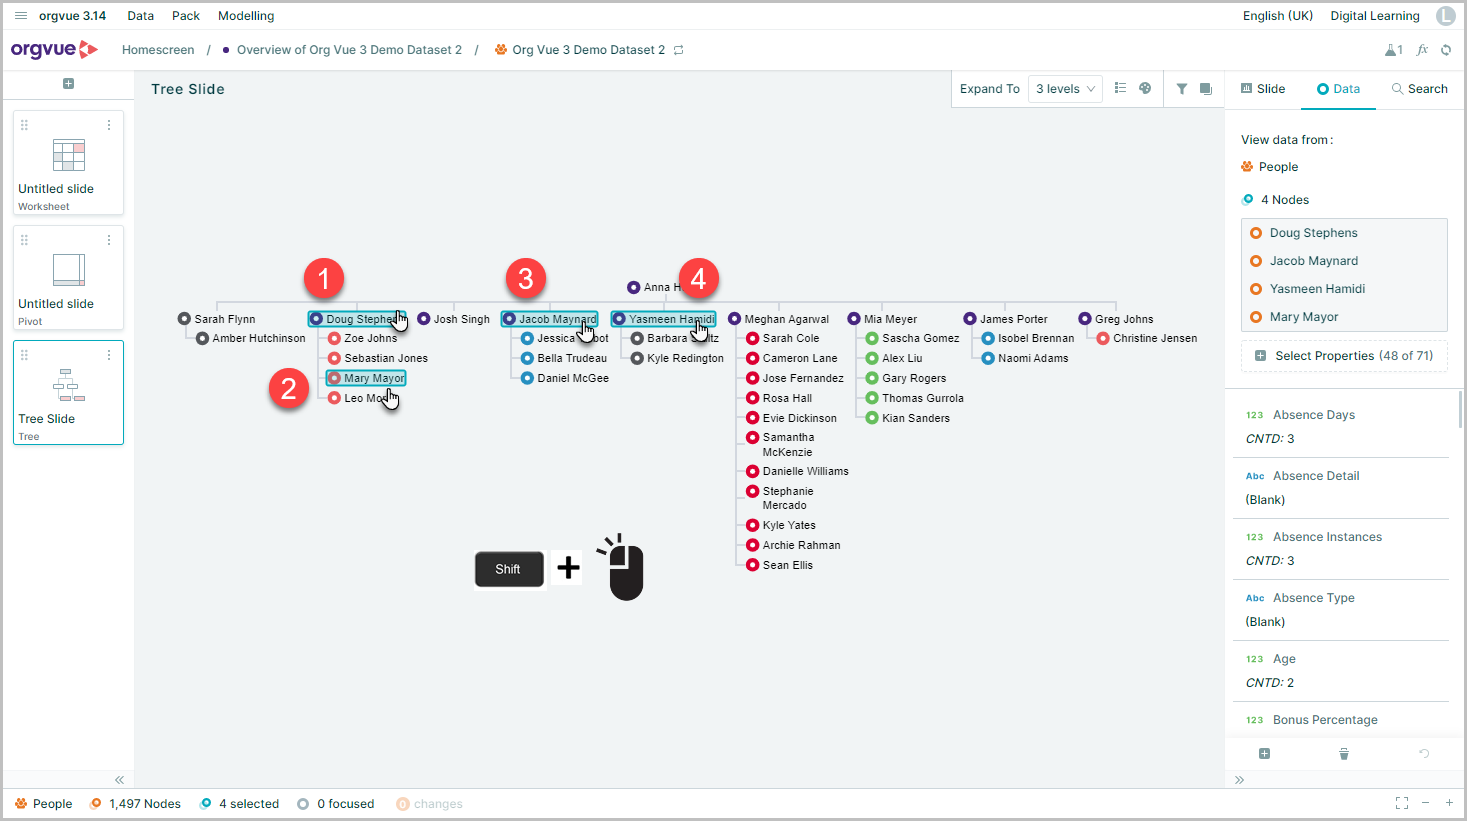
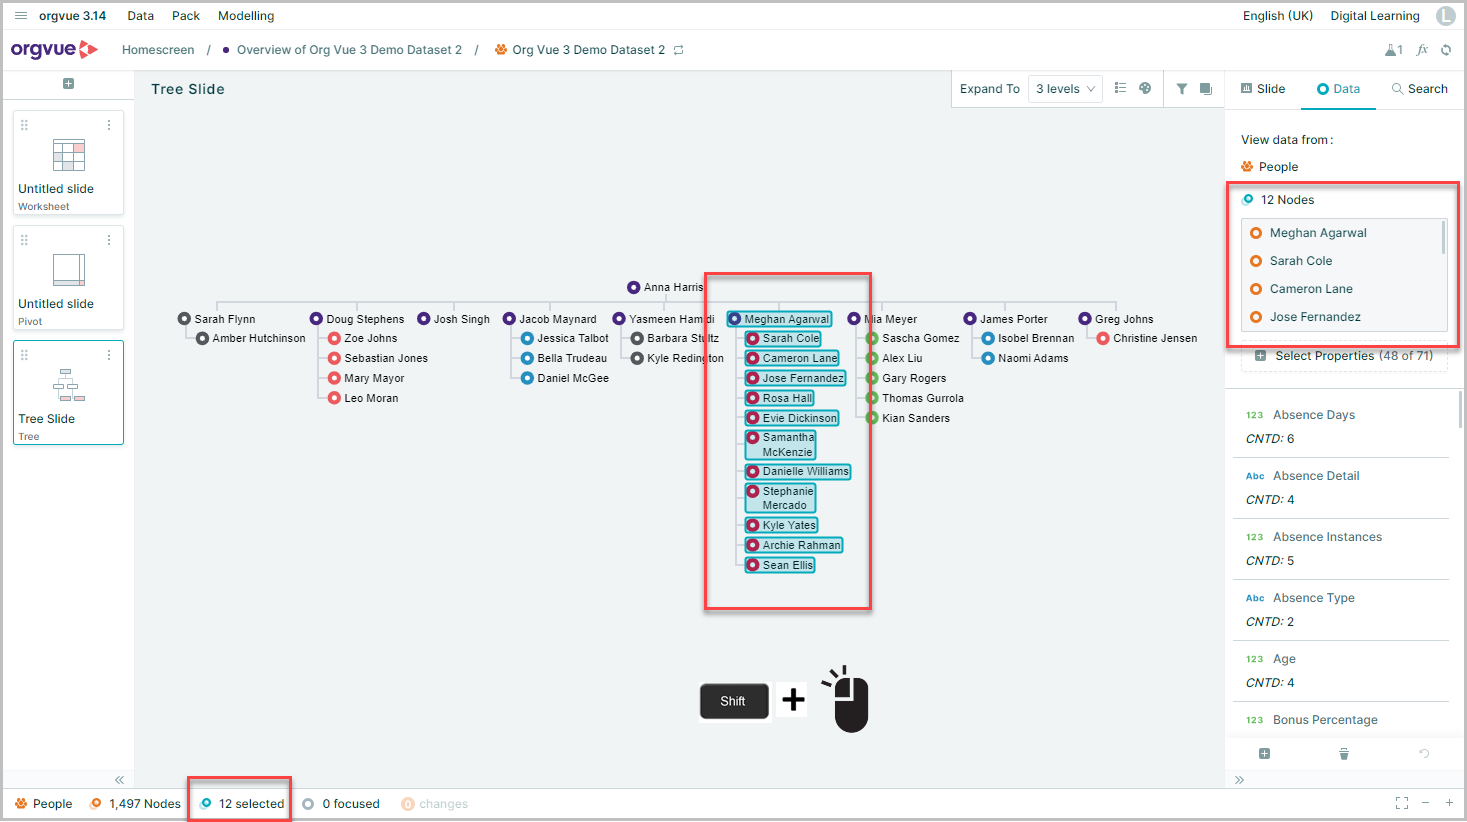
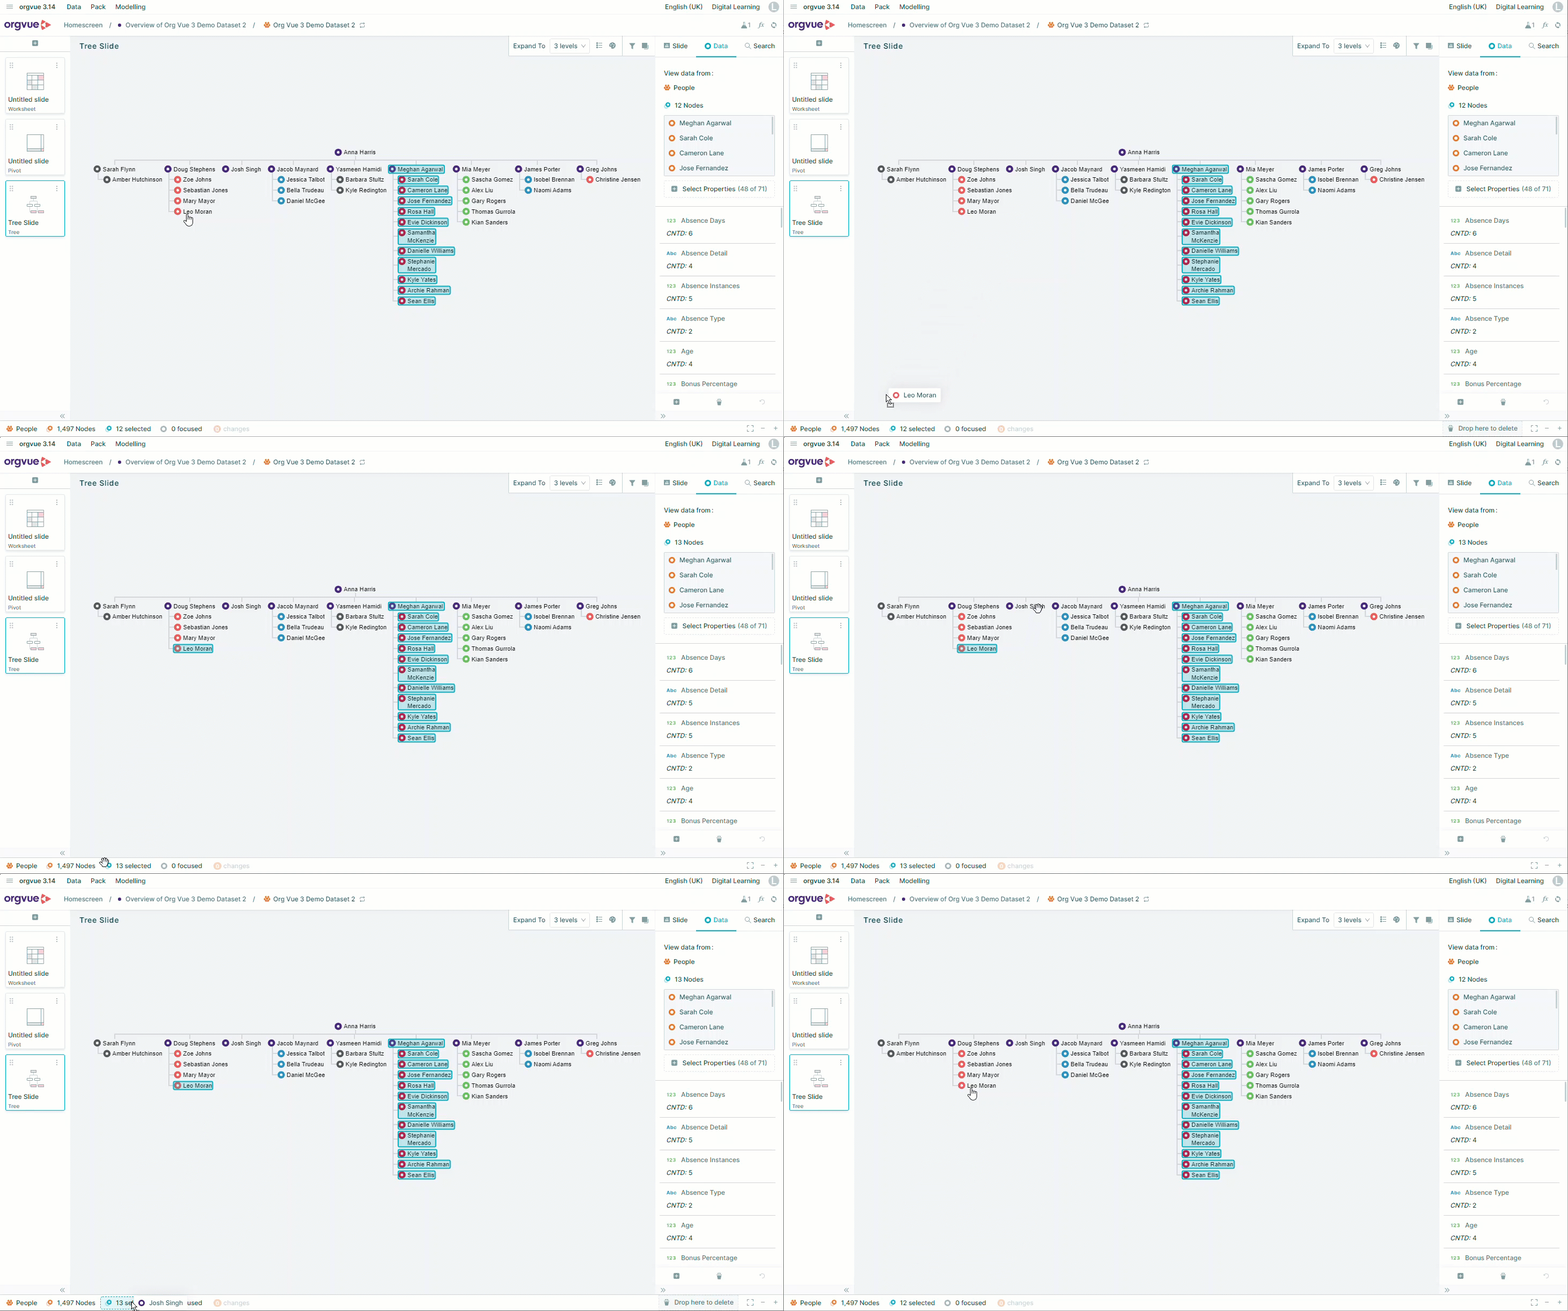
On a Tree slide hold down the Shift button and single left-mouse click each node to select them as shown in the steps 1-4 below
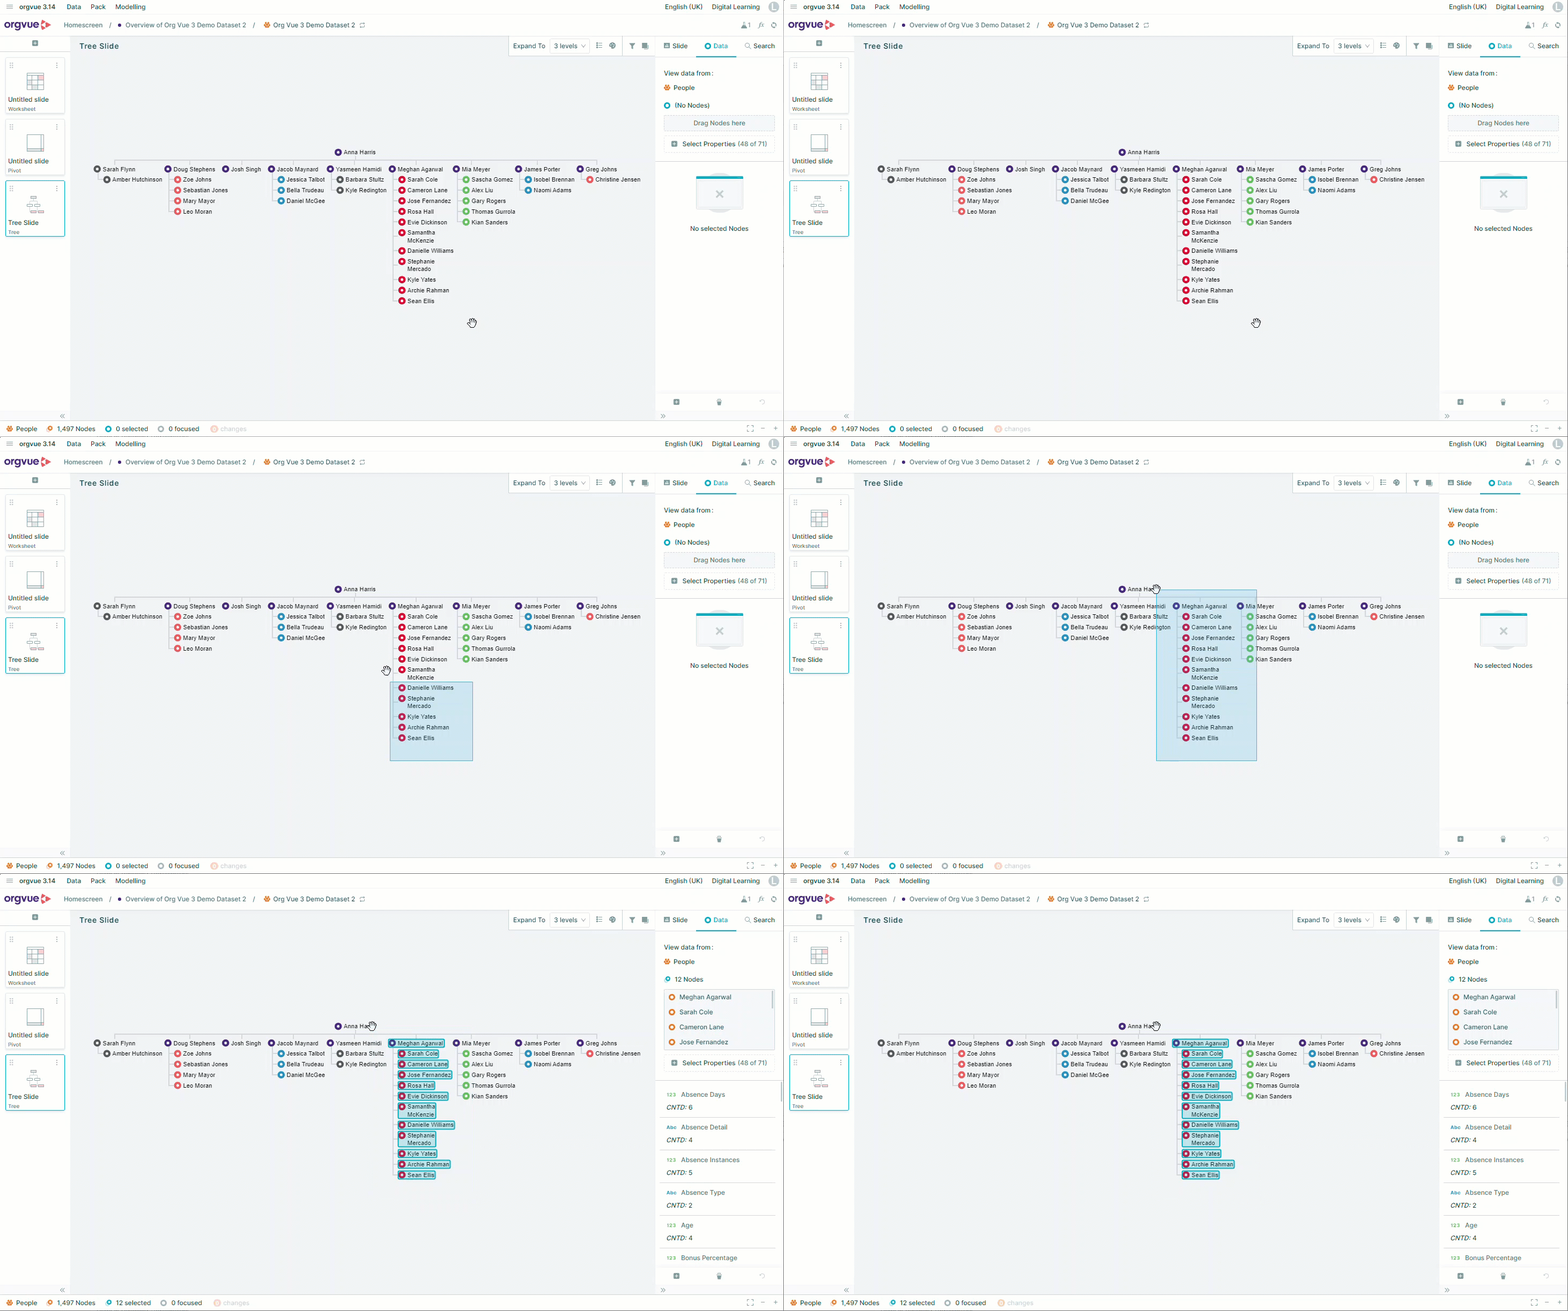
Alternatively hold down the Shift button and drag with the mouse (while holding down the left-mouse button) to ‘lasso’ the nodes you want to select
Multiple nodes may be dragged onto the Nodes Selected area of the Dataset Node Summary to select them
Property Buckets
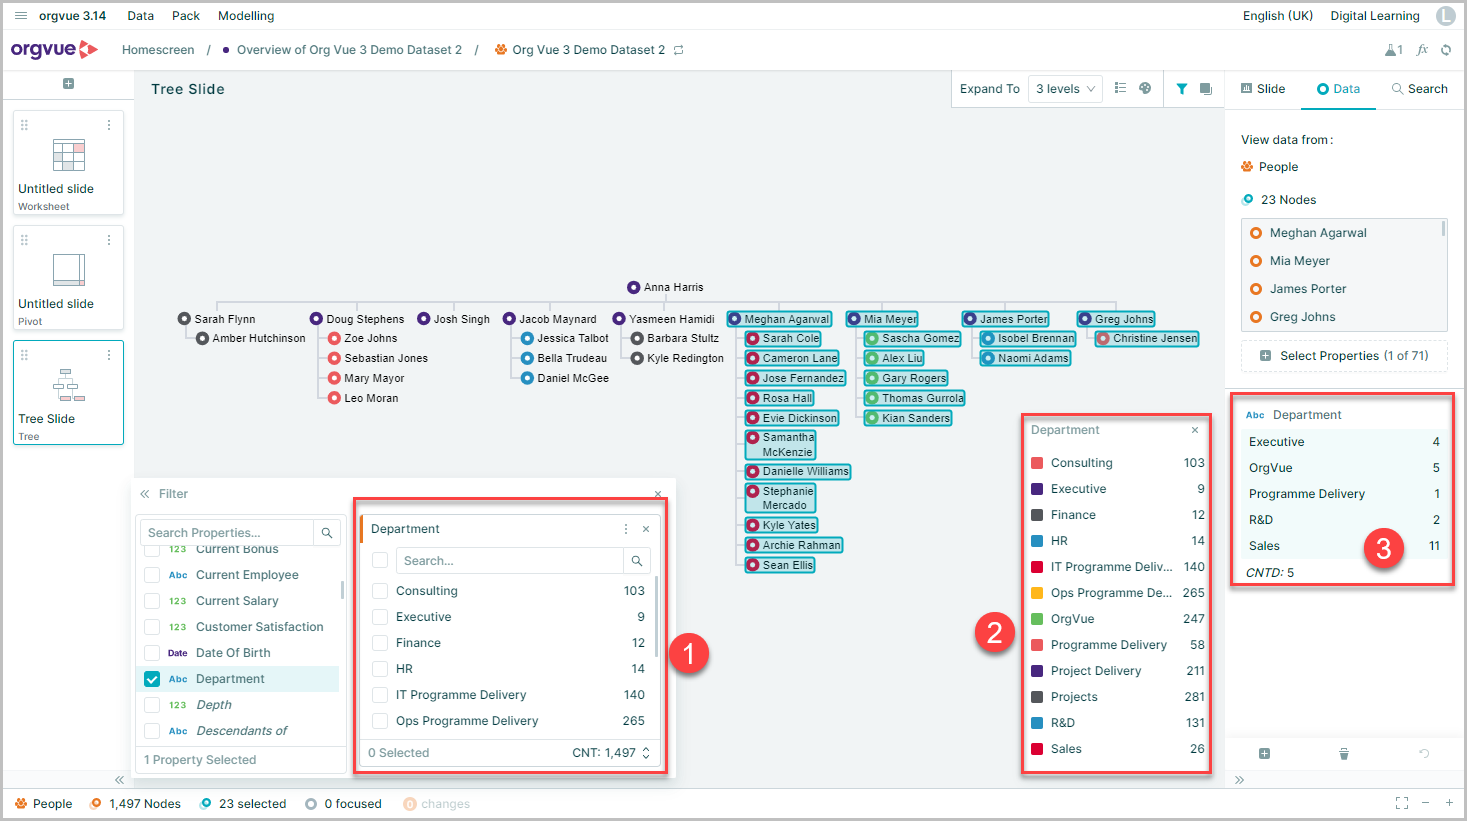
There are three areas within the application where property buckets are displayed
Whenever Property Buckets are displayed, right-clicking on the bucket provides a standard set of actions:
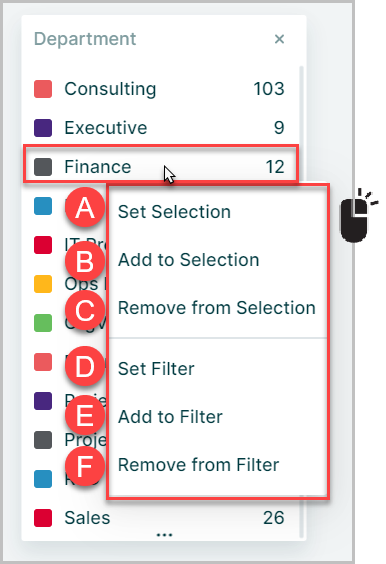
- A. Set Selection
- B. Add to Selection
- C. Remove from Selection
- D. Set Filter
- E. Add to Filter
- F. Remove from Filter
Set Selection
Allows you to set the nodes belonging to the Property Bucket as the Selection
If you already have a pre-existing Selection, Set Selection will override your current Selection with the nodes belonging to the newly selected Property Bucket
Add to Selection
This will add the nodes belonging to the selected Property Bucket to the current Selection (rather than overriding them)
If there is no pre-existing Selection, Add to Selection will have the same effect as Set Selection
Remove from Selection
This will remove the nodes belonging to the selected Property Bucket from the current Selection
Set Filter
Allows you to set the nodes within a Property Bucket as the filter for your current slide
If you already have a pre-existing filter, Set Filter will override your current Filter with the nodes belonging to the newly selected Property Bucket
Add to Filter
This will add the nodes belonging to the selected Property Bucket to the current Filter (rather than overriding them)
If there is no pre-existing filter, ‘Add to Filter’ will have the same effect as ‘Set Filter’
Remove from Filter
This will remove the nodes belonging to the selected Property Bucket from the current filter
Painting With Data
It is possible to make mass changes to your data while you interact with it using a method called Painting with Data
Whenever Property Buckets are shown this allows the editing of data by dragging nodes from one bucket to another
In either the Filter Control, the Color Legend or the Data Tab:
- Select any bucket in one of the above areas
- Drag that bucket onto another in the property list
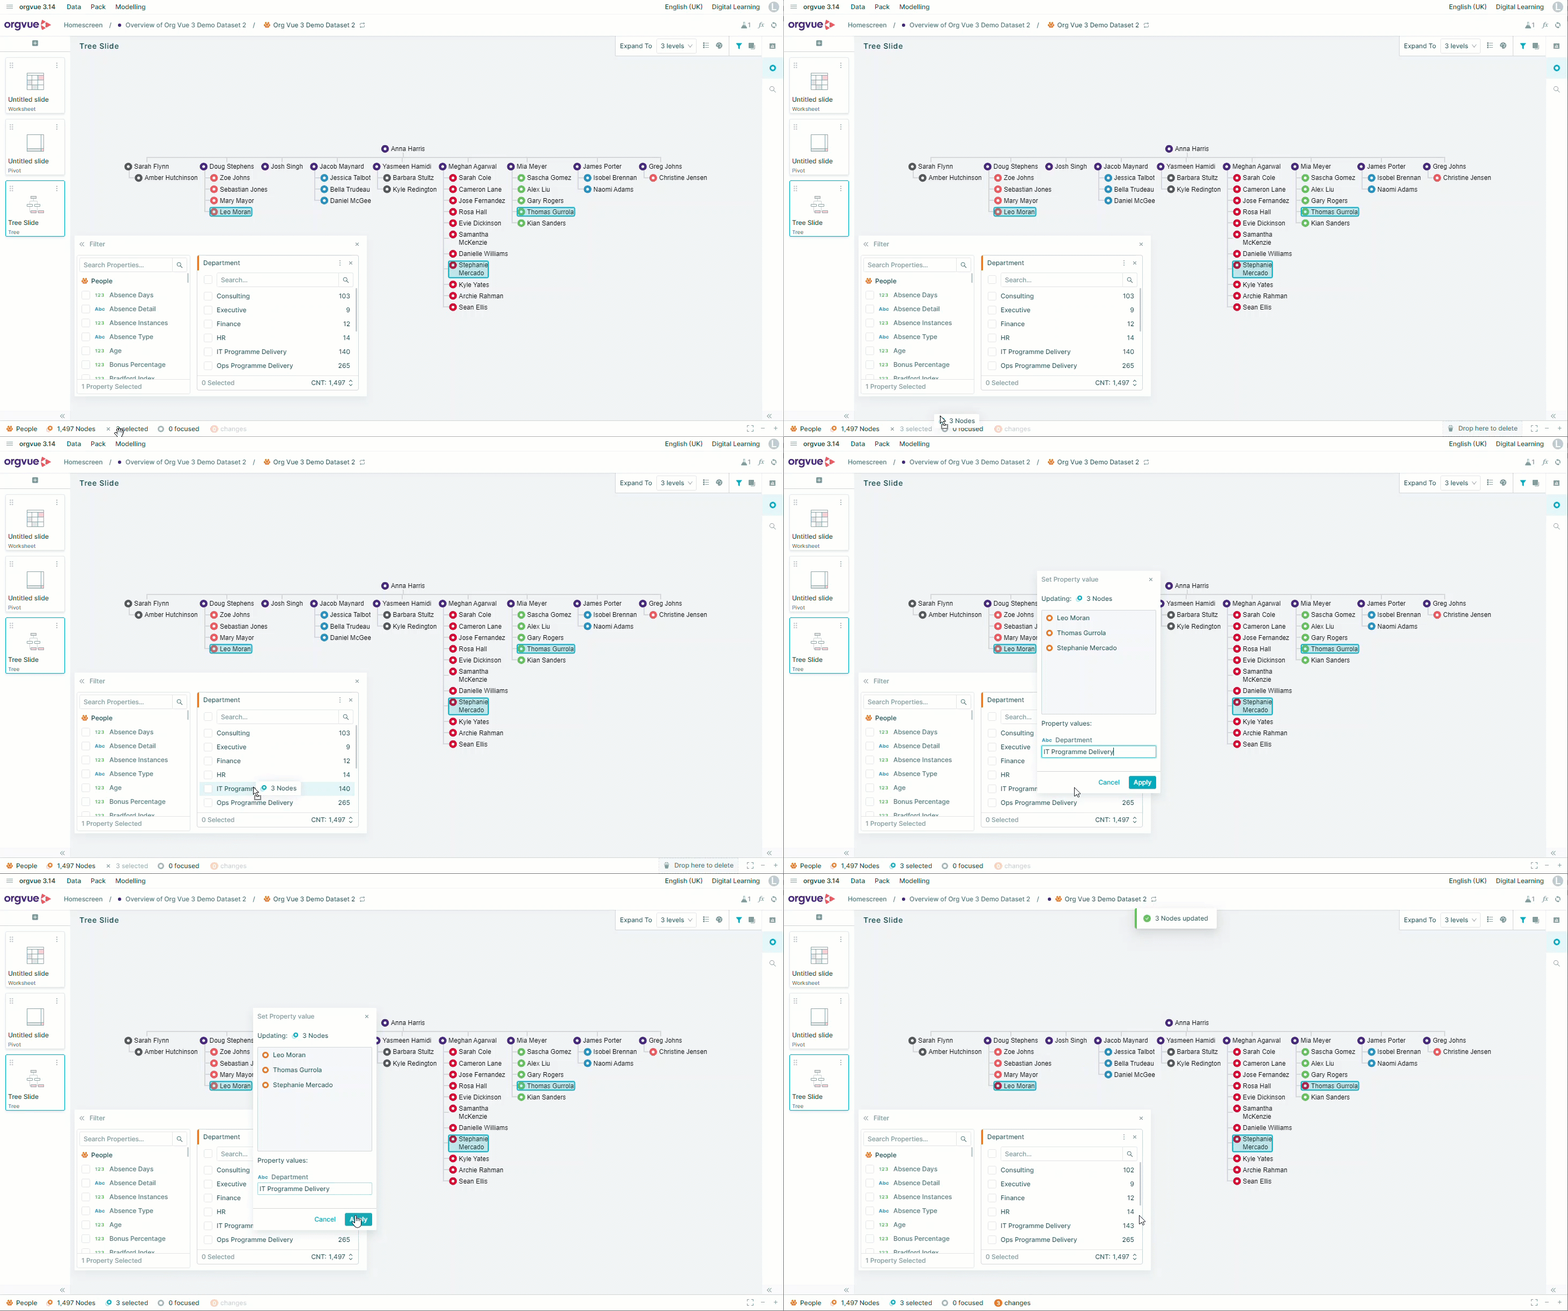
- This opens the Set Property Value window listing the nodes being updated
- The property being updated, and the new value will be shown
- Clicking apply will update the property value for all selected nodes
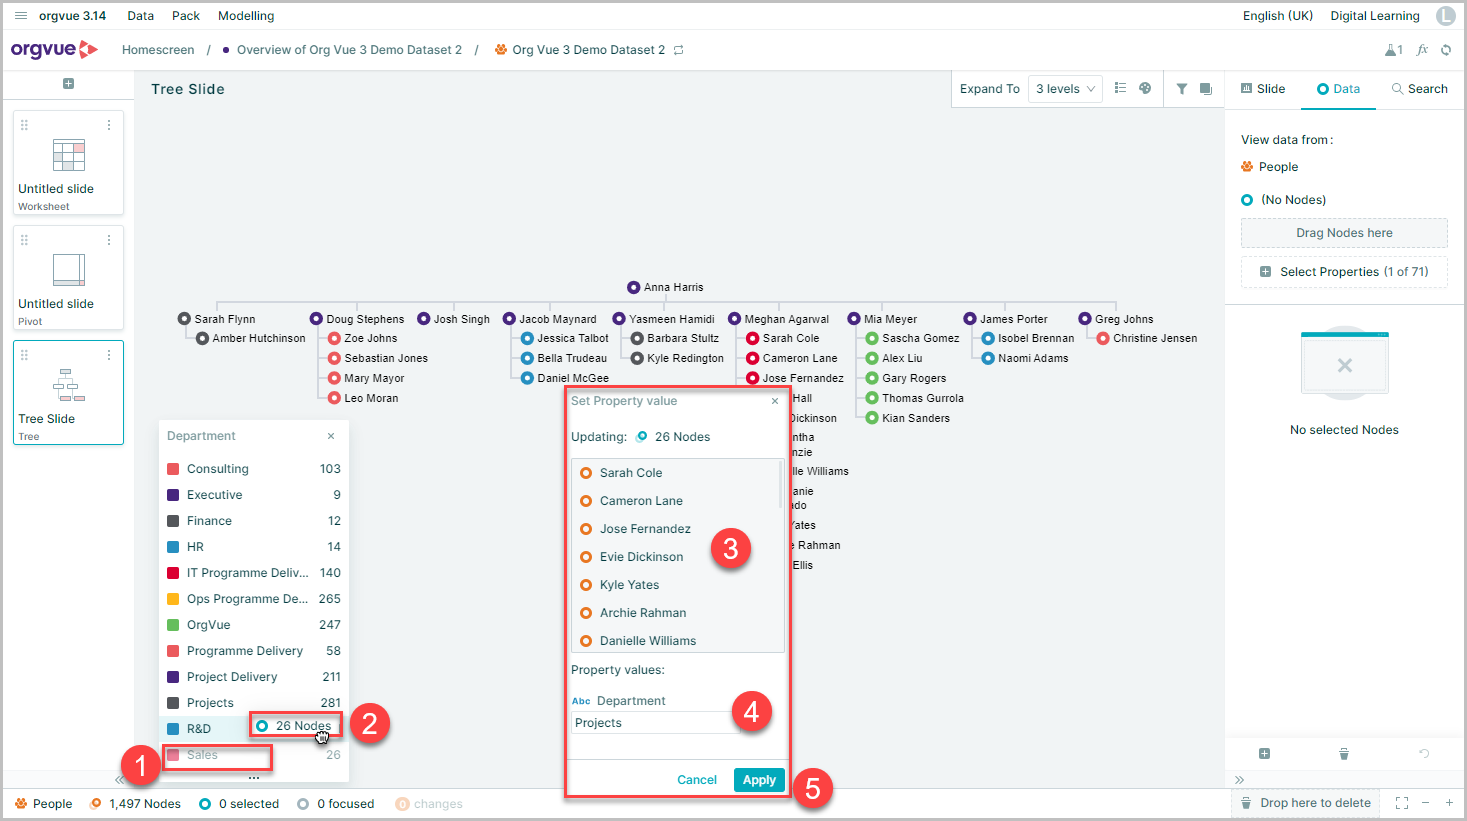
- The Node summary in the footer will then reflect the number of changed nodes

It is also possible to drag nodes that have been selected from the Node Summary on the Footer Bar onto any of the buckets to update the selected nodes with that bucket value